Thursday, June 22, 2017

Left in Knots Water Balloons: Using, Washing, Making & Selling


There's a trendy new crocheted toy around this summer! They're fun, easy to use, environmentally friendly & quick to make. They're the incredibly creative Crochet Water Balloons designed by Megan Meyer of Left in Knots. I've seen a lot about them lately & just had to jump on the band wagon! I decided to make a batch for the craft fair I participated in last weekend & here I'm going to share what I learned from the experience!


Using the Balloons


The first thing I discovered is that there is some confusion about exactly how to use Crochet Water Balloons. A lot of people think that you need to put a real water balloon inside the crocheted one. I briefly considered making a comical video of me actually attempting to do so but decided it wasn't worth the trouble or confusion it might cause! Let me be clear, the crocheted version completely eliminates the need to use those awful little rubber balloons that are challenging to fill, difficult to tie & impossible to clean up! One of my favorite parts about the Crochet Water Balloons is the simplicity of them. Just dunk them in a pail of water, throw them at someone & repeat! The lack of little rubber bits lying around afterwards is reason enough to make the switch & the reason I call them "environmentally friendly."

Of course if I was going to sell these (& write about them) I needed to see them in action! So here are some things I learned when I actually tried them out!

  • They can get you really wet!
  • Don't want to throw them AT each other? Throw them TO each other! Playing catch gets you almost as wet!
  • They sink slowly in the pool - try tossing them in the pool & diving down for them. They definitely won't scratch the liner & whoever retrieves them can throw them next. I see a lot of potential for creative new pool games with these!
  • As soft as they are, if thrown too hard it can smart a little! Use the same rules as regular water balloons. Remember the goal is to soak, not injure. Aim away from faces & don't throw too hard. 
  • They take a while to dry. Spread them out in the sun or hang them from a drying rack or clothes line after you're finished playing. *Update: I've been told that if you use them in a chlorinated pool they should not be left to dry in the sun, but instead washed immediately!* 

Washing the Balloons


Another great part of these balloons is that they are machine washable. After being thrown around & inevitably getting into grass, dirt, mud, leaves, etc. your balloons are likely to get a little grimy. Dunking them in a bucket of water between throws will keep them clean enough to keep playing, to a point. Eventually, they'll need a real clean. So, just toss them in with the next load of laundry! To properly test this aspect I did a little experiment. I washed 4 balloons - grey, pink, red & blue - 4 different ways. I used my front-loading washer on a normal, cold water cycle. The dryer was set on low heat & I used a dryer sheet. Turns out, there really wasn't much difference! I could almost even say that the ones that went through the dryer look a tiny bit better! Whether that would remain true over time is another question, so if you want them to last stick with a bag & air drying. If you just want them clean quickly, forget the bag & toss them in the dryer!
*Update: skip the dryer sheet (& fabric softener), they could make them less absorbent over time*


Grey Balloon: Delicates Bag, Air Dry, Pink Balloon: Delicates Bag, Dryer
Red Balloon: No Bag, Air Dry, Blue Balloon: No Bag, Dryer


Making the Balloons


If you've made these before, or are looking closely at Megan's pictures, you might notice that my balloons are a bit smaller. That's because I left out Round 4. It's a repeat round identical to Round 3 & leaving it out didn't affect how well the pattern worked. I left it out for completely selfish reasons - saving time & saving yarn - & the end result was still a good size & shape for the purpose. Whether you follow the free pattern exactly or not these are very quick (less than 10 minutes for me) & very easy. Megan even has a video tutorial! For materials, you'll need Bernat Blanket Yarn, a 9mm hook, plus a large finishing needle to weave in the end. With my version, each balloon used about half an ounce of yarn which means I can get 21 balloons from each 10.5 oz skein.


Selling the Balloons


Are you doing a craft fair this summer? Or maybe you have an Etsy shop? These balloons sold like hot cakes at my fair last weekend! I was sitting in my booth making more between customers to keep up with the demand. I sold them for $4 each or a set of 3 for $10. Most of my customers bought the set of 3 while many bought 6 ($20). I had all of my balloons in two large (dry) buckets & let customers pick any that they wanted. I recommend having a variety of colors (this is where Bernat Blanket Stripes comes in handy!) because customers never chose all the same color, no matter how many they bought. 

Just remember, if you're going to sell them make sure you give credit where credit is due! At your fair, have a sign (like the one below) that says the design is by Megan Meyer of Left in Knots. If you're listing them online, include a link to her Facebook page or Blog.


Overall I am very impressed by these balloons! They are fun to play with, easy to make & they were a great seller at my fair! Whether you're trying to entertain kids on a hot day or building inventory for your own fair I highly recommend visiting Left in Knots for this great pattern!

Happy Creating!

Monday, April 24, 2017

Mix & Match Critters

Introducing....

The Mix & Match Critters!

Now Available on Ravelry, Craftsy & Etsy!
Special Features:
  • Minimal Assembly: attach as you go arms & legs!
  • Interchangeable parts: make any of the 6 animals with the same basic head/body, just change the features!
  • Use your favorite yarn: it's been tested in various worsted weight yarns so you can switch it up without worry! (see below for description of pictured yarn!)
  • Easy to follow pattern with step-by-step instructions for all the finishing touches
  • Pocket size: Finished critters are about 4 inches tall, that means minimal time & materials!
Included in Pattern:
  • Round Head - for Dog, Koala, Monkey & Mouse
  • Pointy Head - for Fox & Cat
  • Body (same for all)
  • Dog, Koala, Monkey & Mouse Ears
  • Arms & Legs
  • Fox Tail
  • Pointy Snout (for Dog, Fox & Mouse)
  • Flat Snout (for Cat & Monkey)
  • Instructions for adding eyes/noses, defining cat/fox ears, & making a braided tail
Materials needed:
  • 3.5mm hook 
  • Your favorite soft, worsted weight yarn (see below)
  • Stuffing
  • Embroidery thread (optional)
  • Finishing needle, embroidery needle
  • Safety Eyes/Noses (optional, see below)
The Critters shown were made with Loops & Threads Colorwheel in the following colors:
  • Grey Heather (koala)
  • Toast (cat, accents on monkey)
  • Orange (fox)
  • Gold (dog)
  • Dark Taupe (monkey, accents on cat)
  • Pale Taupe (mouse, accents on koala)
  • Charcoal (accents on fox)
Each Critter requires approximately 32 yards of yarn depending on parts used.

Safety Eyes & Noses:
All of the Critters have 4.5mm eyes. The noses pictured are as follows:
  • Cat: 6mm triangle
  • Dog: 9mm triangle
  • Fox: 6mm triangle
  • Koala: 10mm oval
  • Monkey: embroidered
  • Mouse: 6mm circle (actually an eye!)
Please note: Safety eyes/noses are recommended for ages 3 & up. If you are making a toy for a younger child consider embroidering facial features instead!


Sunday, April 2, 2017

Featured Pattern: Betsy the Huggable Ballerina

April's Featured Pattern:

Betsy the Huggable Ballerina


For the month of April 2017 this pattern will be available for $2 
on Craftsy, Ravelry & Etsy! 
That's $3 off!! No code needed!

Betsy features no-sew, attach-as-you-go limbs! Her arms & legs are made first so they can be added to the body as you go. This technique is easy to learn & so much faster than sewing!

Check out my video tutorial to see how easy it is! Or click here for written instructions.


Measuring about 18 inches from head to toe this cutie works up fast! She’s made with super bulky blanket yarn & an 8mm hook. You'll need 4 colors, each less than 72 yards so the 3.5 oz skeins will be plenty!

Pattern includes step-by-step instructions for making & assembling this doll. All of her little details - headband, straps, tutu, laces - are explained as well.

Materials needed:
  • Bernat Blanket Yarn in 4 colors (skin, hair, outfit, tights)
  • 8mm (L) Hook
  • Large finishing needle
  • Pink worsted or bulky yarn (mouth)
  • 15mm black safety eyes
  • Lots of Stuffing!
Techniques used:

Find the pattern on Ravelry: Click Here!
And on Etsy: Click Here!
And on Craftsy: Click Here!

Wednesday, March 1, 2017

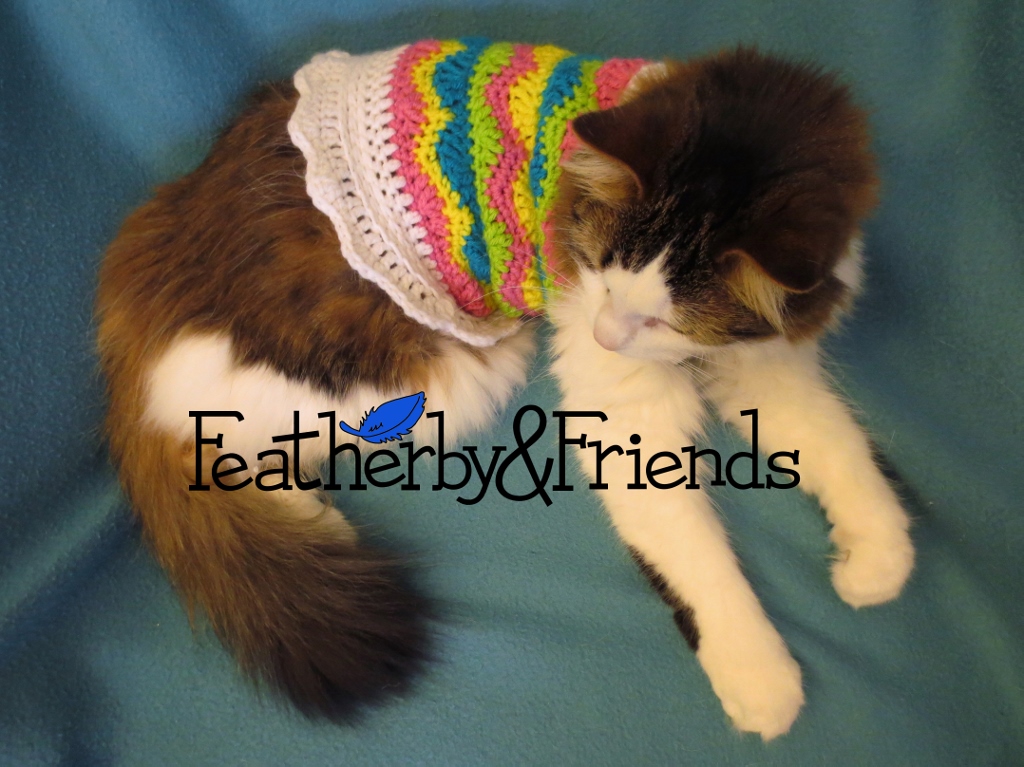
Featured Pattern: Eggcellent Pet Sweater

March's Featured Pattern:

An Eggcellent Pet Sweater


For the month of March 2017 this pattern will be available for $1 
on Ravelry & Etsy! 
That's 50% off!! No code needed!

Get your pet ready for Easter with this Eggcellent sweater! Designed for cats (or dogs) that are approximately 10-14 pounds it's sure to impress!


Finished dimensions:
  • 12 inches long (add or subtract rounds of white to adjust!)
  • 5 inches wide or 10 inches around at neck (unstretched)
  • 8 inches wide or 16 inches around at belly (unstretched)
Materials needed:
  • Worsted Weight Yarn in your choice of colors (about 180 yards)
  • 5mm (H) Hook
  • Large finishing needle
Techniques used: 
  • Foundation Half Double Crochet
  • HDC in the Third Loop
  • Single, Double & Treble Crochet
  • Working in the round
  • Chains & working in chain spaces

Find the pattern on Ravelry: Click Here!
And on Etsy: Click Here!

Note: This sweater is not intended to be worn for long periods of time. Keep a close eye on your pet while he/she is wearing it and remove if the pet seems distressed.

Tuesday, February 28, 2017

Mix & Match Lovies


Introducing....
The Mix & Match Lovies!

Now Available on Ravelry, Craftsy & Etsy!

Special Features:
  • Minimal Assembly: the only parts that need to be sewn on are the snout, owl eyes, & bear ears. Even the blankets are attached as you go!
  • Interchangeable parts: Make any animal with any blanket
  • Use your favorite yarn: it's been tested in various worsted weight yarns so you can switch it up without worry! (Shown in Hobby Lobby I Love This Yarn: White, Light Grey, Light Peach, Glacier & Ocean)
  • Easy to follow pattern with step-by-step instructions for all the finishing touches

Included in Pattern:
  • Round Head - for bunny, bear, & puppy
  • Pointy Head - for owl, fox & cat
  • Stripy Blanket (show with cat & puppy)
  • Lacey Blanket (shown with owl & bunny)
  • Bumpy Blanket (shown with bear & fox)
  • Puppy, Bunny & Bear Ears
  • Arms & Wings
  • Snout & Owl Eyes
  • Instructions for embroidering faces, defining cat/fox ears, & adding owl feathers
Materials needed:
  • 4mm hook (for head, arms/wings, snout, ears, owl eyes)
  • 5mm hook (for blankets)
  • Your favorite soft, worsted weight yarn
  • Stuffing
  • Embroidery thread
  • Finishing needle, embroidery needle

Now available: Elephant Lovey!
This adorable Elephant & "Elly" Blanket are compatible with the original lovies! The Elephant can be made with any of the 3 original blankets & the original animals can all be made with the Elly blanket! Available on Ravelry & Etsy!


Useful video tutorials:


Not sure if you're ready for this pattern? Check out the Bluebird CAL! It's a 5-part video that guides you step by step from Magic Loop to Finishing Touches on a little bluebird. A great way to learn essential amigurumi techniques before attempting a bigger project!

Click HERE to go to the YouTube Bluebird CAL Playlist!


Sunday, February 26, 2017

Free Crochet Pattern: Six Round Cowl

Looking for something cute & warm to get you through the last bit of winter?

I whipped up this cowl to match a hat I made earlier this winter. I loved the results so much I decided I just had to share! My cowl is only 6 rounds, is 6 inches tall, measures about 20 inches around the top & 30 inches around the bottom. It took me about half an hour to make plus 10 minutes or so to add the fringe.

To make this cowl you need:
80 yards bulky yarn (I used Loops & Threads Charisma in Taupe)
9mm hook (N or M depending on brand)

Stitches used:
Foundation Double Crochet
Extended Double Crochet


If you haven't used these stitches before, this small project with easy-to-see bulky yarn is the perfect opportunity to learn! Foundation Double Crochet (or any foundation stitch) can be a little tricky to get the hang of, but it makes such a lovely stretchy edge that once you master it you'll never want to go back to working into a starting chain! As for Extended Double Crochet, it's super simple. It makes just a slightly taller more flexible stitch than regular double but is tighter than a treble. The result is a fabric with nice drape & a project that grows quickly!

For a PDF that includes instructions for additional sizes visit Featherby & Friends on Ravelry.


If you'd like to make the hat I'm wearing it's a free pattern from Bernat Design Studio called Stepping Texture: http://www.ravelry.com/patterns/library/stepping-texture-hat

Made this cowl? Add your project to Ravelry! Click HERE for a step-by-step guide!


Thursday, February 2, 2017

Featured Pattern: Colby the Huggable Cat

February's Featured Pattern:

Colby the Huggable Cat


For the month of February 2017 this pattern will be available for $1 
on Craftsy, Ravelry & Etsy! 
That's 80% off!! No code needed!

Colby was the first Huggable Buddy to feature no-sew, attach-as-you-go limbs! All four legs (and his tail!) are made first so they can be added to the body as you go. This easy time-saving technique is now part of many other patterns as well!

Check out my video tutorial to see how easy it is! Or click here for written instructions.


Finished dimensions:
  • 20 inches tall
  • 6 inches wide
  • 1 lb of huggable sweetness!
Materials needed:
  • Bernat Blanket Yarn in Little Sandcastles (160 yards) & Vintage White (55 yards)
  • 8mm (L) Hook
  • Large finishing needle
  • Black worsted or bulky yarn (mouth)
  • Pink felt, pink worsted yarn, tapestry needle (nose)
  • Suncatcher Craft Eyes - 24mm Sleepy Lime Green
  • Lots of Stuffing!
Techniques used:
  • Single Crochet
  • Working in the round
  • Increasing & decreasing (shaping)
  • Attaching Limbs as you go - click the link for a video tutorial!
  • Magic Loop - click the link for a video tutorial!

Don't have Blanket Yarn? No problem! 
Colby can also be made with worsted weight yarn & a 4mm hook! Here's Colby & Catsby his miniature buddy! Catsby's eyes are 12mm Glow-in-the-dark Cat Eyes!


Find the pattern on Ravelry: Click Here!
And on Etsy: Click Here!
And on Craftsy: Click Here!

Sunday, January 1, 2017

Featured Pattern: Nanuk the Huggable Polar Bear!

January's Featured Pattern:

Nanuk the Huggable Polar Bear


For the month of January 2017 this pattern will be available for $1 
on Craftsy, Ravelry & Etsy! 
That's 80% off!! No code needed!

Nanuk was the very first Huggable Buddy so it makes sense for him to be the very first Featured Pattern of 2017! This was the first time I designed a stuffed animal using Bernat Blanket Yarn & I quickly fell in love with it. It is so soft & squishy that the finished product is irresistibly huggable! Nanuk is the perfect buddy to cuddle up with on a cold winter night!

Finished dimensions:
  • 14 inches long
  • 10 inches tall (standing)
  • 6 inches wide
  • 1 lb of huggable sweetness!
Materials needed:
  • Bernat Blanket Yarn (Super Bulky) in White (220 yards)
  • 8mm (L) Hook
  • Large finishing needle
  • Black worsted or bulky yarn (mouth)
  • Black felt, black worsted yarn, tapestry needle (nose)
  • Suncatcher Craft Eyes - 24mm Sleepy Sky Blue
  • Lots of Stuffing!
Techniques used:
  • Single Crochet
  • Working in the round
  • SC in back loop only
  • Increasing & decreasing (shaping)
  • Magic Loop - click the link for a video tutorial!


Nanuk with a Big Sister Doll!
Find Nanuk on Ravelry: Click Here!
And on Etsy: Click Here!
And on Craftsy: Click Here!

For more about Nanuk's Sleepy Eyes: Click Here!

Tuesday, December 13, 2016

The Big Brother Elf!

Introducing the first Big Brother Doll.... Felix!


The Big Brother Doll pattern is the first doll pattern to feature no-sew, attach as you go limbs! All of the dolls will eventually be adapted to be no-sew as well but Felix is the first!

The Big Brother Doll has a built in shirt & undies like his Little Brother. The pattern also includes shorts to match Little Brother's & instructions for making suspenders.


For the rest of December get the Big Brother Elf Outfit pattern FREE with purchase of the Big Brother Doll pattern! No code needed, just add both patterns to your Ravelry cart.


Also available:
Big Sister Doll & Elf Dress
Little Sister Doll & Elf Dress
Little Brother Doll & Elf Outfit


Visit us on Facebook!

Saturday, December 3, 2016

Vote for the Mix & Match Monsters!

I am excited to be part of the Amigurumi Monsters Design Contest! 
There are so many amazing designs it is just a teeny bit intimidating, but I love my Mix & Match Monsters and hope you do too!


They're full of mischief & curiosity...


... but mostly just want to be buddies!

"Please vote for us!"


For more about the Mix & Match Monster pattern click here!

*Note: To vote click on the heart in the corner of the photos. Everyone gets 5 votes. When you select 5, you'll have the option to submit your vote!*


Thursday, December 1, 2016

Featured Pattern: Seamus the Huggable Sheep!


December's Featured Pattern:

Seamus the Huggable Sheep


For the month of December 2016 this pattern will be available for $1 on Ravelry & Etsy! 
That's 80% off!! No code needed!

Finished dimensions:
  • 14 inches long
  • 11 inches tall (standing)
  • 19 inches around the belly
  • 1 lb of huggable sweetness!
Materials needed:
  • Bernat Blanket Yarn (Super Bulky) in: Dark Grey - 85 yards, White - 90 yards
  • 8mm (L) Hook
  • Large finishing needle
  • Black worsted or bulky yarn (for nose & mouth)
  • Suncatcher Craft Eyes - 24mm Sleepy Green
  • Lots of Stuffing!
Techniques used:
  • Single Crochet
  • Working in the round
  • SC in front or back loop only
  • 1 color change
  • Increasing & decreasing (shaping)
  • Magic Loop - click the link for a video tutorial!


Find Seamus on Ravelry: Click Here!
And on Etsy: Click Here!