Showing posts with label Activities. Show all posts

Friday, March 2, 2018

Birthday Giveaway

Friday, March 9, 2018 marks 3 years since I started Featherby & Friends!

It has been such an exciting adventure! In addition to designing patterns, I started doing video tutorials, stop motion, photo editing & even writing a little jingle! I've learned so much along the way & I can't wait to see what the future brings!

To celebrate this milestone, I am throwing a week-long celebration complete with contests, coupons, games & (of course) PRIZES!

For the FIRST day:
It's a BIG GIVEAWAY! To enter visit Featherby on Facebook!


Thursday, June 22, 2017

Left in Knots Water Balloons: Using, Washing, Making & Selling


There's a trendy new crocheted toy around this summer! They're fun, easy to use, environmentally friendly & quick to make. They're the incredibly creative Crochet Water Balloons designed by Megan Meyer of Left in Knots. I've seen a lot about them lately & just had to jump on the band wagon! I decided to make a batch for the craft fair I participated in last weekend & here I'm going to share what I learned from the experience!


Using the Balloons


The first thing I discovered is that there is some confusion about exactly how to use Crochet Water Balloons. A lot of people think that you need to put a real water balloon inside the crocheted one. I briefly considered making a comical video of me actually attempting to do so but decided it wasn't worth the trouble or confusion it might cause! Let me be clear, the crocheted version completely eliminates the need to use those awful little rubber balloons that are challenging to fill, difficult to tie & impossible to clean up! One of my favorite parts about the Crochet Water Balloons is the simplicity of them. Just dunk them in a pail of water, throw them at someone & repeat! The lack of little rubber bits lying around afterwards is reason enough to make the switch & the reason I call them "environmentally friendly."

Of course if I was going to sell these (& write about them) I needed to see them in action! So here are some things I learned when I actually tried them out!

  • They can get you really wet!
  • Don't want to throw them AT each other? Throw them TO each other! Playing catch gets you almost as wet!
  • They sink slowly in the pool - try tossing them in the pool & diving down for them. They definitely won't scratch the liner & whoever retrieves them can throw them next. I see a lot of potential for creative new pool games with these!
  • As soft as they are, if thrown too hard it can smart a little! Use the same rules as regular water balloons. Remember the goal is to soak, not injure. Aim away from faces & don't throw too hard. 
  • They take a while to dry. Spread them out in the sun or hang them from a drying rack or clothes line after you're finished playing. *Update: I've been told that if you use them in a chlorinated pool they should not be left to dry in the sun, but instead washed immediately!* 

Washing the Balloons


Another great part of these balloons is that they are machine washable. After being thrown around & inevitably getting into grass, dirt, mud, leaves, etc. your balloons are likely to get a little grimy. Dunking them in a bucket of water between throws will keep them clean enough to keep playing, to a point. Eventually, they'll need a real clean. So, just toss them in with the next load of laundry! To properly test this aspect I did a little experiment. I washed 4 balloons - grey, pink, red & blue - 4 different ways. I used my front-loading washer on a normal, cold water cycle. The dryer was set on low heat & I used a dryer sheet. Turns out, there really wasn't much difference! I could almost even say that the ones that went through the dryer look a tiny bit better! Whether that would remain true over time is another question, so if you want them to last stick with a bag & air drying. If you just want them clean quickly, forget the bag & toss them in the dryer!
*Update: skip the dryer sheet (& fabric softener), they could make them less absorbent over time*


Grey Balloon: Delicates Bag, Air Dry, Pink Balloon: Delicates Bag, Dryer
Red Balloon: No Bag, Air Dry, Blue Balloon: No Bag, Dryer


Making the Balloons


If you've made these before, or are looking closely at Megan's pictures, you might notice that my balloons are a bit smaller. That's because I left out Round 4. It's a repeat round identical to Round 3 & leaving it out didn't affect how well the pattern worked. I left it out for completely selfish reasons - saving time & saving yarn - & the end result was still a good size & shape for the purpose. Whether you follow the free pattern exactly or not these are very quick (less than 10 minutes for me) & very easy. Megan even has a video tutorial! For materials, you'll need Bernat Blanket Yarn, a 9mm hook, plus a large finishing needle to weave in the end. With my version, each balloon used about half an ounce of yarn which means I can get 21 balloons from each 10.5 oz skein.


Selling the Balloons


Are you doing a craft fair this summer? Or maybe you have an Etsy shop? These balloons sold like hot cakes at my fair last weekend! I was sitting in my booth making more between customers to keep up with the demand. I sold them for $4 each or a set of 3 for $10. Most of my customers bought the set of 3 while many bought 6 ($20). I had all of my balloons in two large (dry) buckets & let customers pick any that they wanted. I recommend having a variety of colors (this is where Bernat Blanket Stripes comes in handy!) because customers never chose all the same color, no matter how many they bought. 

Just remember, if you're going to sell them make sure you give credit where credit is due! At your fair, have a sign (like the one below) that says the design is by Megan Meyer of Left in Knots. If you're listing them online, include a link to her Facebook page or Blog.


Overall I am very impressed by these balloons! They are fun to play with, easy to make & they were a great seller at my fair! Whether you're trying to entertain kids on a hot day or building inventory for your own fair I highly recommend visiting Left in Knots for this great pattern!

Happy Creating!

Tuesday, November 1, 2016

Mix & Match Monsters

Introducing the Mix & Match Monsters!


Pattern Features:

  • Interchangeable Parts: All of the heads, legs, arms, eyes, mouths, etc can be rearranged to make unlimited monster combinations!
Monsters made by my amazing testers!

  • Attach as you go legs: Intimidated by all those octopus legs? They are attached as you go so there is no sewing later on! Check out the video tutorial to see how it's done! Link also included in pattern.
  • Not too big & not too small: Each monster is about 8-9 inches tall. A great size for playing & hugging but it doesn't take forever to make!
  • Cut & Paste Sheet: Included with the pattern is a Cut & Paste sheet with all sorts of parts! Cut out the pieces & rearrange as much as you want until you get exactly the right combination! Great for letting the kids make their own designs.

  • Easy to Follow formatting: As with all Featherby & Friends patterns I spend a lot of time getting the layout just right! Color coding, space for checking off rounds & lots of pictures with labels. It all comes together to make a pattern that is easy to read so it's easy to make!

Materials Needed:

  • Worsted Weight (4) yarn: I used Loops & Threads Impeccable (pictured in Sunny Day, Clear Blue & Kelly Green). Each monster uses approximately 150-200 yards depending on parts.
  • Hook Size G (4.0mm)
  • Stuffing
  • Safety Eyes: shown in 12mm & 15mm but really any size can work for a monster! If you are making a monster for a child under 3 consider crocheting or embroidering eyes instead.
  • Yarn needle, finishing needle
  • Felt: I used white felt for the teeth but you can use it for other parts too - spots, spikes, belly, mouth, even eyes!
  • Sewing needle & thread: only if you use felt!
  • Scissors, glue, plain paper, crayons: for cutting, pasting & coloring your Monster designs!
PDF version included with pattern!

Where to get the Pattern:

The Mix & Match Monsters are available in all 3 Featherby & Friends stores; Ravelry, Craftsy, & Etsy. Wherever you shop please remember to come back & rate the pattern!

Share Your Monsters!

  • Instagram: tag your creations #featherbyandfriends
  • Facebook: Post on the Featherby & Friends facebook page or tag @featherbyandfriends on your own timeline! Send me your photos to be included in the "Featherby's Friends" photo album!
  • Ravelry: Create a project & I just might request to feature your photo! Not sure how? Find step by step instructions here!

Thursday, August 7, 2014

Craft Time: Bean Bags!


Here's a fun, easy summer-time craft that ultimately gets you outside and moving!

All you need is:

- felt (or an old t-shirt, denim from when you turned those old jeans into cut-offs, any fabric really)
- scissors
- hot glue
- an old flyer or other scrap of paper
- tape
- some kind of filling such as dried beans, rice, or corn

And here's how you do it:

1. Cut out a rectangular piece of fabric about 6 inches wide and 8 inches long (a little bigger or smaller won't hurt!)

2. Fold the fabric in half hamburger style and crease/mark the middle.

3. On one half only, use your hot glue gun to carefully line three edges with glue leaving about a 1 1/2 inch gap for filling. Fold the fabric back in half pressing firmly to seal the edges and create a pouch.


4. Make a funnel - roll your flyer/paper into a cone shape making sure to keep a hole at the point. Secure with a piece of tape. Test it out using your filling. If the filling does not flow freely then cut the hole a little bigger.


5. Use your brand new funnel to fill the fabric pouch with beans, rice or corn.


6. Finally seal the opening carefully using hot glue. Double check all of the seams for leaks and reinforce weak spots with more hot glue.


Make a set of 4 or enough to go around. For even more fun try:
- bigger bean bags
- smaller bean bags
- different shapes
- different colors
- decorate with sharpies

And finally, now that you have a bunch of bean-bags here are a couple of ideas of what to do with them!

A hula-hoop and skipping rope are all you need to make a simple bean bag toss. Just lay down the rope in a straight line and lay the hula hoop a few feet away. Then all players stand behind the line and try to toss the bean bag into the hoop. 

But... if you want to make things more interesting I suggest finding a driveway or sidewalk and some sidewalk chalk. Here are some designs that have been tested and are child-approved! Change it up by adding more/bigger/smaller/different shapes or changing the point value (good for practicing math skills!).


Tuesday, July 1, 2014

Cardboard Creations

In 2005 the cardboard box was inducted into the Toy Hall of Fame. I can remember hearing that it had been nominated and thinking it was brilliant. When it actually made it in I was thrilled.

During my childhood my mom was a very successful Avon lady. Each shipment of orders arrived in several cardboard boxes which would, as soon as they were emptied, be claimed by my brothers and I. We turned those boxes into cars, beds, trains and more. We were lucky to have an endless supply. As soon as one batch of boxes got destroyed or boring, just like magic, another batch arrived. Every once in a while we acquired boxes of different shapes and sizes from other sources and that only fueled our creativity.

Some toys are designed to encourage imaginative play and creativity. Some are supposed to improve fine or gross motor skills, while others teach ABC’s, counting and more. However, no matter how expensive or complex a toy is there is always the possibility that the child will be just as excited about the box it comes in. So, every once in a while it makes sense to skip the expensive toy altogether and just get a box.

Here are just a few ideas of what to do with a cardboard box:

Puppet Theatre – Cut* out a hole in the front for the stage and a hole in the bottom to put your hand in. Decorate using crayons, markers, fabric, paint or whatever else you can find. Secure on the edge of a table so the puppeteer can hide underneath. If you happen to have a box big enough for the puppeteer to fit inside you can just make a hole for the stage (either in front or on top!).

Robot Costume – Cut* holes for the child’s head and arms then decorate with whatever robot-themed items you can find (tin-foil, plastic cups, bottle caps, pipe-cleaners, etc).

House/Fort – Cut* only three sides of the windows and doors so they can swing open and closed. Small peep-holes of different shapes and sizes are especially fun for forts. As always, decoration is key.  Use markers or crayons to add shutters, a doorbell, house number, and even a flower garden. Adults/big kids can draw the outlines for little ones to color in.

Barn – Same thing as the house except it only needs to be as big as their animals. Smaller boxes can be used for water and food troughs, yarn for hay, and pipe-cleaners or popsicles sticks for fences.

Train – If you have a few boxes of similar shapes and sizes line them up to make a train. Draw on wheels and connect them with string or even just tape. Load them up with passengers (real or imaginary) and you’re ready to go!


Cars – Draw on wheels and other details and use a paper plate for a steering wheel!

Bed – All you really need is a blanket and someone to tuck in. You can make it fancier by cutting* out a head and footboard and adding a pillow for a mattress.

All of these can be adapted to be educational as well as fun. Try decorating your box with the alphabet and/or numbers. Practice shapes by making windows that are squares, circles, triangles, etc. Learn colors by making each side of the box a different color. Larger forts with lots of doors and tunnels can be good for gross motor skills while making the decorations is good for fine motor skills. Remember the inside of the box can be decorated too!

The possibilities are only limited by your imagination, and the number of boxes you can find!


*Cutting cardboard can be difficult! I prefer to mark where I need to cut then take the box well away from little fingers and hands (kitchen counters work well) and use a knife rather than scissors. If you have little ones who are going to chew on the edges a little packing tape will help it to last longer and limit the amount of cardboard that is ingested.

Sunday, May 4, 2014

Crayons are Fun!

There is a special pleasure to be had from coloring with crayons. The waxy smell, the sound of the paper peeling off, the slightly textured imprint left behind; it all brings back fond memories of childhood. However, I am afraid that crayons do not hold the same appeal for today's young artists. Crayons have been overshadowed by their messier, smellier cousins: markers.

Part of the problem is that somehow crayons have acquired the label of being "babyish." Most children start coloring with crayons. Then, at some point in time they learn that there is another bolder, messier writing utensil that is being kept from them. Children have a fierce desire to grow up, to be big and do the things big kids do. When they graduate from one level to the next there is no turning back. Just try convincing a 7 year old to put his training wheels back on his bike or go back to using a sippy cup! Crayons have been relegated into the same category as training wheels and sippy cups - big kids just don't use them.
Unfortunately, markers simply can not replace crayons, no matter what the big kids say. Part of the problem and probably the appeal of markers is the potential for a monstrous mess. It's true that sneaky toddlers can and will make messes with crayons, however with markers messes happen faster and even by accident. Markers soak through paper staining tables and floors, hands that rest too long on a colored spot become that color, and a dropped marker can create polka-dots with every bounce. Have you ever opened a coloring book to find that every other picture has been colored with marker, and all the rest are ruined? The thin paper of coloring books is no match for the soaking power of markers. In all fairness, markers do have their purposes, but when it comes to the typical everyday artwork of children they just don't measure up.

There are also reasons to love crayons regardless of their competition. Crayons have a unique texture and appearance. Pressing harder or lighter creates different shades with one single crayon. They can be blended and layered to create shadows, highlights and brand new colors. Not that there is a lack of colors! In a giant box of crayola crayons you can find such delightful hues as "macaroni and cheese," "tumbleweed," and "robin's egg blue." Not to mention "tickle-me-pink," "timber wolf," and "purple mountain's majesty."


I think you get the idea. I really like crayons, for practical reasons and in a nostalgic kind of way too. The smell, the sound, and the feel make me think of happy times drawing at the kitchen table. I do a lot of drawing these days, but no medium has quite the therapeutic, relaxing effect of crayons. It's time to give crayons a little more credit. Big kids, and yes even adults, can use crayons too.

Thursday, March 13, 2014

Fox and Rabbits

This week has been a perfect example of how unpredictable March can be. On Tuesday it was gorgeous! The sun was shining and the temperature reached almost 50 degrees Fahrenheit. It felt like spring had arrived! Then Wednesday happened. We had the biggest snow storm of the season. During the course of the day just over 16 inches of snow landed and then blew around a lot. The roads were awful and everything was shut down. 

I still maintain that I love the snow, but I also definitely loved Tuesday! It was so nice to get a good dose of sunshine! Today has been cold cold cold, but the sun is shining again. So I did what I do after a good snowfall; I went cross-country skiing!

However, as I was skiing it occurred to me that a lot of my friends do not have the freedom to just strap on some skis and go. They have children, and when children are added to the equation everything becomes a little more complicated. So as I enjoyed my nice, quiet leisurely skiing I was thinking about the activities I enjoy doing when there are children around.

At this point in the winter you have probably built about 50 snowmen, a bunch of forts, a few dozen snow angels and cleaned enough snow out of the boots, necks and sleeves of crying children to make yet another snowman. So, I was trying to think of something new to make this latest snowfall a little more exciting (or at least less depressing??).

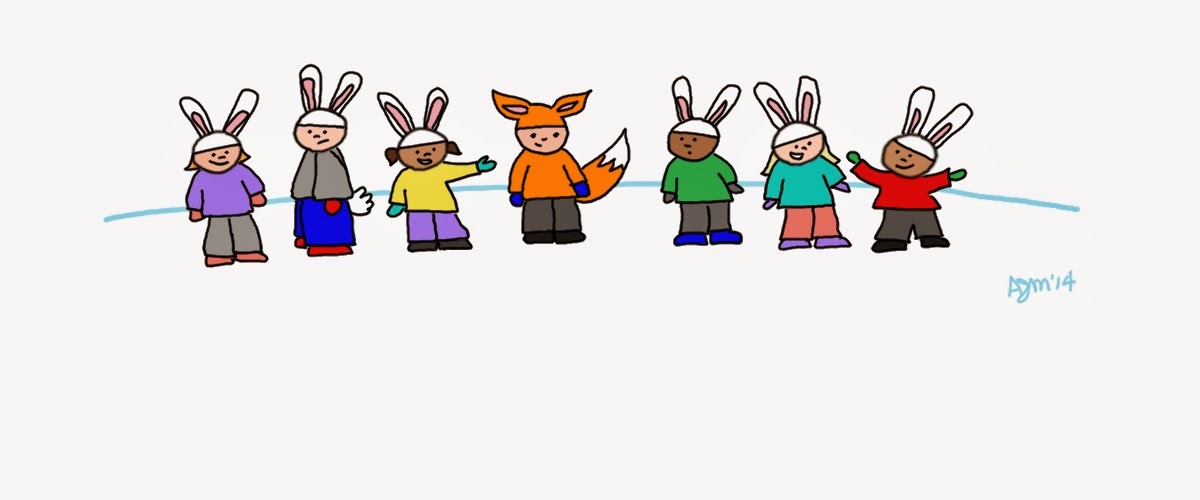
What I came up with is a game I call "Fox and Rabbits." I have no idea if this is a real game or if it is one my friends and I made up, but I can remember playing it as a child. I have taught it to a few groups of children over the years and it is usually a hit. Basically it is a winter twist on the classic game of Tag.


So, here is your step by step guide to enjoying this latest snowfall and any more March decides to send your way.

Step One: Gather a bunch of children
Sons, daughters, nieces, nephews, grandchildren, children you babysit, children you teach, and all of their friends. This game is best with at least 4 but if you're short on children a couple of energetic adults will do.

Step Two: Prepare for the snow!
Boots, snow pants, coats, hats, scarves, etc. You know the drill.

Step Three: Form a line
To prepare for the game you need to form a line and march around the yard single file. Start by making a nice big circle (the more children involved the bigger the circle should be). Then cut through the middle and divide your circle first in half then two more cuts dividing it into a total of 6 slices. When you're finished you should have a well stomped path that looks like a giant pie in your yard.

Step Four: Pick a Fox
Using whichever method of selection you prefer choose one child to be the fox. If you have a very large group you can try using two foxes.

Step Five: Don't get caught!
Everyone who is not a fox is now a rabbit. So, with everyone staying on the track you just made, the rabbits must now avoid the fox!

Step Six: Last Rabbit Standing
If you chose a quick fox your rabbits will eventually be caught. When a rabbit is caught (like in Tag this is just with a touch), they leave the track. When there is only one rabbit left on the track he or she is declared winner and becomes the next fox.

Step Seven: Return to the Warren
Which means go inside, take off piles of wet snow clothes, and sit down for a cup of hot chocolate while reliving the excitement of your game! If you joined in, add a couple of extra marshmallows to your cup when the kids aren't looking. You earned it!

If you're a parent, or other caregiver of children, I hope this game gives you one more way to get a little more fun out of winter. You never know what March will do next but at least if this snow sticks around you'll have another option to try!