Creating a Project on Ravelry
Step One: Find the pattern you used
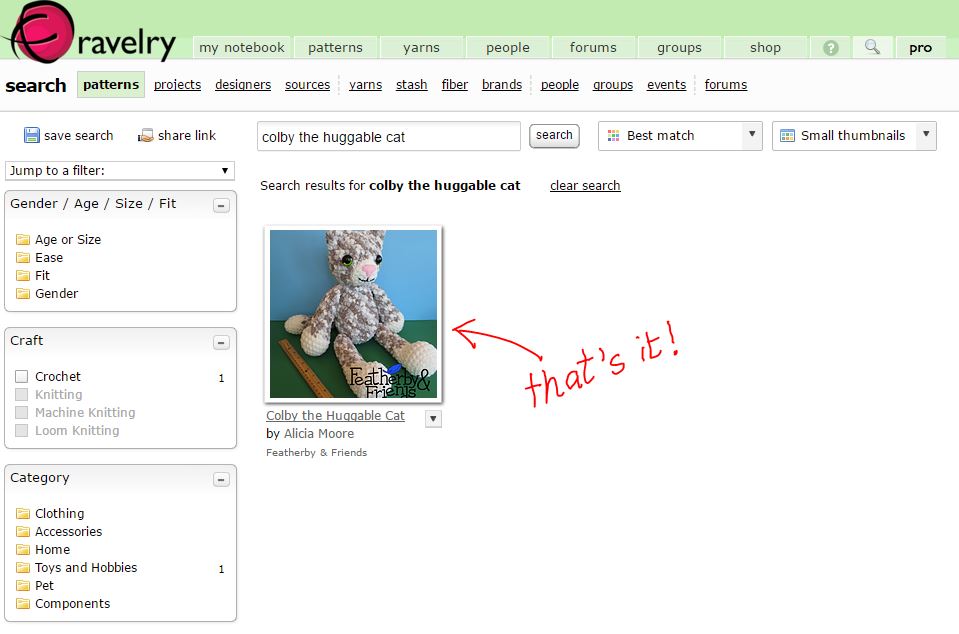
When you open Ravelry, click on "Patterns" at the top. Next type in the name of the pattern or designer, and finally click search.
If your pattern appears right away, great! Click on it & move on. If not, use the criteria on the left to narrow it down.
Step Two: Hook it! (or if you're knitting, Cast on!)
Click on "hook it" with the little crochet hook next to it.
A box will open where you can type in the name of your project (i.e. Alicia's Cat), then click "Create this Project."

Step Three: Add lots of details!
In order to edit your project you have to click "edit project" or that tiny little pencil. Doing so will open up a new page with tabs you can type in, stars you can click & much more!
Here's where the fun begins!
1. Make sure you click the face that best represents your feelings about the project!
2. Fill in your rating for the pattern & the difficulty
3. Make lots of detailed notes!
Also... adding the hook & yarn you used is especially important if you used something other than what the designer recommended. Make sure you say why you switched in your notes & how well it worked.
There are many other fields you can fill in too but you don't have to do them all to save your project.

Make sure you save all of your changes...

Step Four: Adding Pictures
Click where it says "Add Photos." (see #4 in the previous picture) A new page will open that looks like this:
1. It should automatically look like this but if it doesn't click on "upload from computer." Unless you want to use one of the other methods then click on those.
2. Click on "Choose Files" & find the file(s) you want to use. You can choose more than one at once by holding down the Ctrl key.
3. Click "upload" then be patient. As long as you chose files that are a reasonable size it won't take long for a list of files to show up on the screen along with progress bars. When they finish uploading they should appear on the screen like this:

Next, you can either click on "upload from computer" again & add more pictures, or click on "details" to go back to the main project page.
Step Five: Share your Project!
After clicking on "details" you'll be back at the main project page. It should show your pictures & all of the details you entered.
 At the top right click on "Share This." Then you can choose to send it to someone on Ravelry or to "Share this page with others..."


If you chose to "Share this page with others" you will be given two more options. You can make it public for all to see or click on "Invite - access with link" for even more options.

If you chose the "Invite" option you'll see a box like the one below. Just copy & paste the link to share it with any one you choose or use Facebook, Twitter or Pinterest to do your sharing.

The Finished Project
When you're finished, you'll have a concise summary of your project. If you're thorough other people can use it to help decide if they want to make their own & the designer can get an idea of how well the pattern is working!
I hope this guide was helpful! Next time you're looking for a new pattern remember to check out the projects people have posted. It could help you find your new favorite pattern!
Visit me on Facebook for more information, patterns & more!
Please check out my Ravelry Store & create projects for any of my designs you have made!
No comments:
Post a Comment