Showing posts with label Reviews. Show all posts

Thursday, June 22, 2017

Left in Knots Water Balloons: Using, Washing, Making & Selling


There's a trendy new crocheted toy around this summer! They're fun, easy to use, environmentally friendly & quick to make. They're the incredibly creative Crochet Water Balloons designed by Megan Meyer of Left in Knots. I've seen a lot about them lately & just had to jump on the band wagon! I decided to make a batch for the craft fair I participated in last weekend & here I'm going to share what I learned from the experience!


Using the Balloons


The first thing I discovered is that there is some confusion about exactly how to use Crochet Water Balloons. A lot of people think that you need to put a real water balloon inside the crocheted one. I briefly considered making a comical video of me actually attempting to do so but decided it wasn't worth the trouble or confusion it might cause! Let me be clear, the crocheted version completely eliminates the need to use those awful little rubber balloons that are challenging to fill, difficult to tie & impossible to clean up! One of my favorite parts about the Crochet Water Balloons is the simplicity of them. Just dunk them in a pail of water, throw them at someone & repeat! The lack of little rubber bits lying around afterwards is reason enough to make the switch & the reason I call them "environmentally friendly."

Of course if I was going to sell these (& write about them) I needed to see them in action! So here are some things I learned when I actually tried them out!

  • They can get you really wet!
  • Don't want to throw them AT each other? Throw them TO each other! Playing catch gets you almost as wet!
  • They sink slowly in the pool - try tossing them in the pool & diving down for them. They definitely won't scratch the liner & whoever retrieves them can throw them next. I see a lot of potential for creative new pool games with these!
  • As soft as they are, if thrown too hard it can smart a little! Use the same rules as regular water balloons. Remember the goal is to soak, not injure. Aim away from faces & don't throw too hard. 
  • They take a while to dry. Spread them out in the sun or hang them from a drying rack or clothes line after you're finished playing. *Update: I've been told that if you use them in a chlorinated pool they should not be left to dry in the sun, but instead washed immediately!* 

Washing the Balloons


Another great part of these balloons is that they are machine washable. After being thrown around & inevitably getting into grass, dirt, mud, leaves, etc. your balloons are likely to get a little grimy. Dunking them in a bucket of water between throws will keep them clean enough to keep playing, to a point. Eventually, they'll need a real clean. So, just toss them in with the next load of laundry! To properly test this aspect I did a little experiment. I washed 4 balloons - grey, pink, red & blue - 4 different ways. I used my front-loading washer on a normal, cold water cycle. The dryer was set on low heat & I used a dryer sheet. Turns out, there really wasn't much difference! I could almost even say that the ones that went through the dryer look a tiny bit better! Whether that would remain true over time is another question, so if you want them to last stick with a bag & air drying. If you just want them clean quickly, forget the bag & toss them in the dryer!
*Update: skip the dryer sheet (& fabric softener), they could make them less absorbent over time*


Grey Balloon: Delicates Bag, Air Dry, Pink Balloon: Delicates Bag, Dryer
Red Balloon: No Bag, Air Dry, Blue Balloon: No Bag, Dryer


Making the Balloons


If you've made these before, or are looking closely at Megan's pictures, you might notice that my balloons are a bit smaller. That's because I left out Round 4. It's a repeat round identical to Round 3 & leaving it out didn't affect how well the pattern worked. I left it out for completely selfish reasons - saving time & saving yarn - & the end result was still a good size & shape for the purpose. Whether you follow the free pattern exactly or not these are very quick (less than 10 minutes for me) & very easy. Megan even has a video tutorial! For materials, you'll need Bernat Blanket Yarn, a 9mm hook, plus a large finishing needle to weave in the end. With my version, each balloon used about half an ounce of yarn which means I can get 21 balloons from each 10.5 oz skein.


Selling the Balloons


Are you doing a craft fair this summer? Or maybe you have an Etsy shop? These balloons sold like hot cakes at my fair last weekend! I was sitting in my booth making more between customers to keep up with the demand. I sold them for $4 each or a set of 3 for $10. Most of my customers bought the set of 3 while many bought 6 ($20). I had all of my balloons in two large (dry) buckets & let customers pick any that they wanted. I recommend having a variety of colors (this is where Bernat Blanket Stripes comes in handy!) because customers never chose all the same color, no matter how many they bought. 

Just remember, if you're going to sell them make sure you give credit where credit is due! At your fair, have a sign (like the one below) that says the design is by Megan Meyer of Left in Knots. If you're listing them online, include a link to her Facebook page or Blog.


Overall I am very impressed by these balloons! They are fun to play with, easy to make & they were a great seller at my fair! Whether you're trying to entertain kids on a hot day or building inventory for your own fair I highly recommend visiting Left in Knots for this great pattern!

Happy Creating!

Thursday, July 28, 2016

Susie & Sunnie


Meet Susie & Sunnie! 

Two best friends who love the outdoors!


Both dolls are made from the Featherby & Friends Little Sister Pattern 
& both dolls feature Suncatcher Craft Eyes!


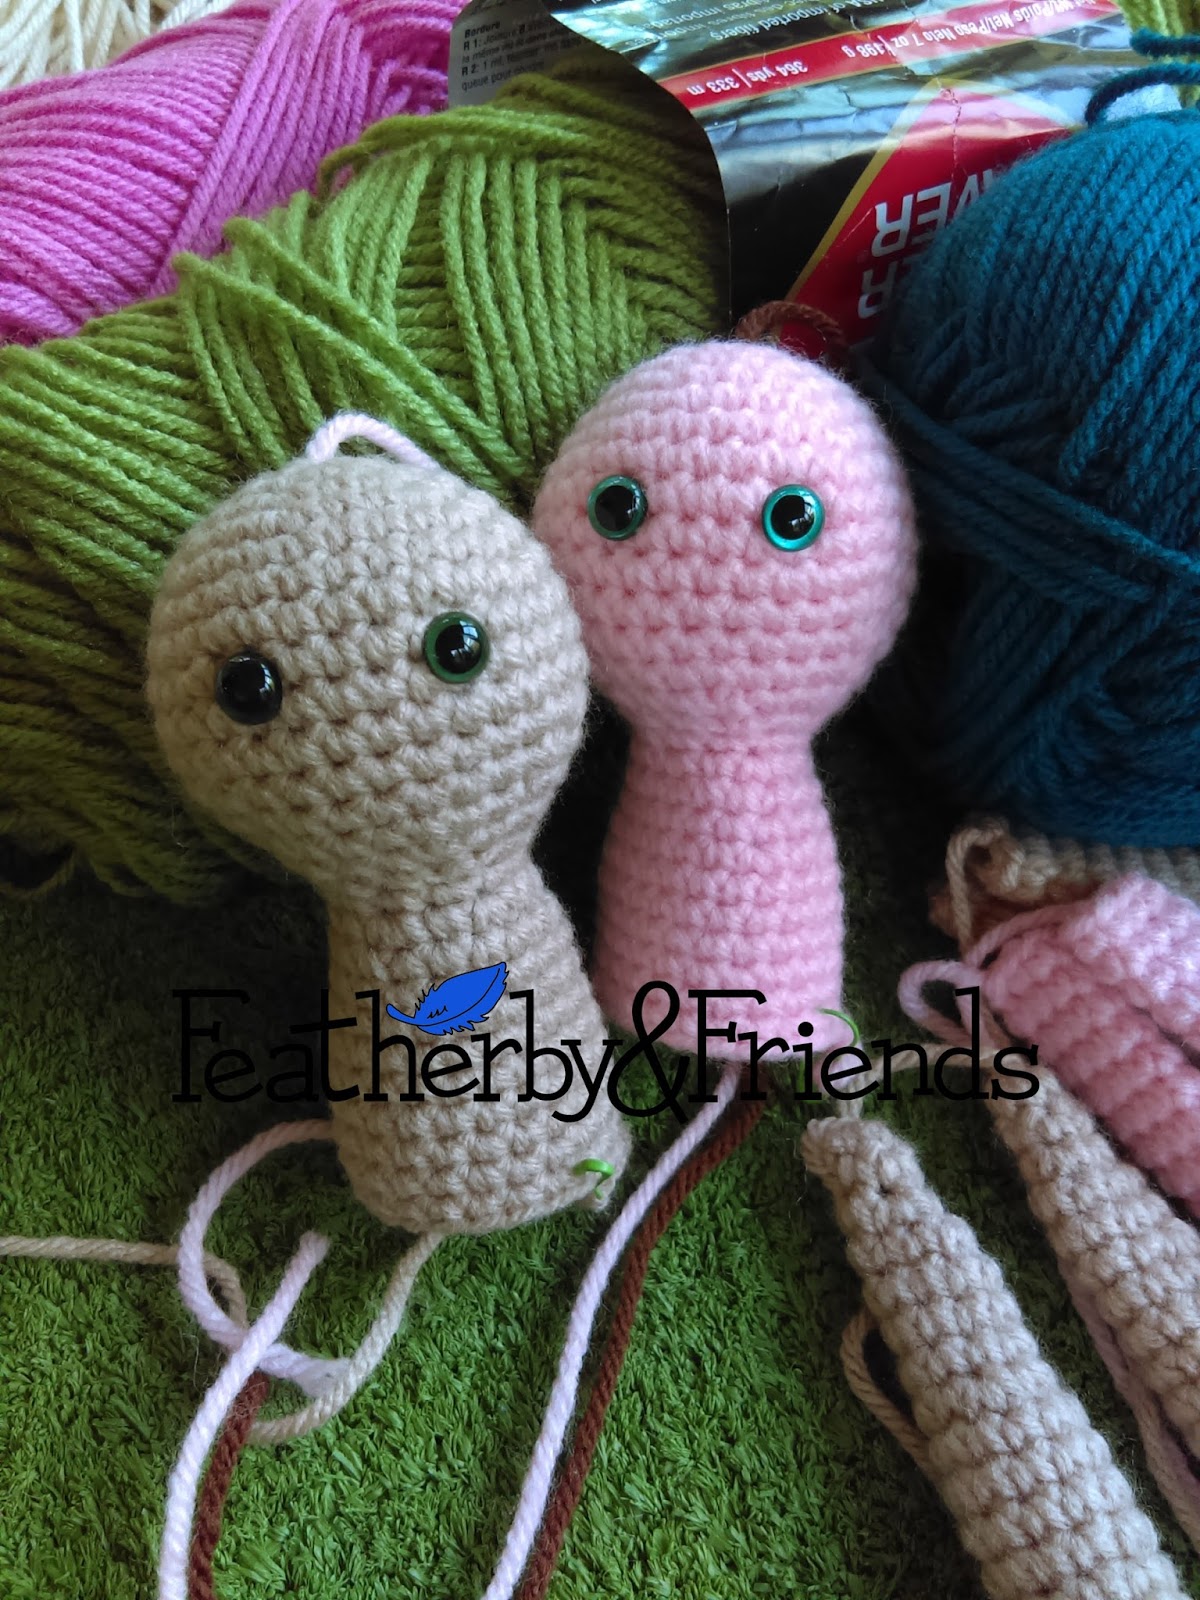
For Susie, I finally used the Opaque Ivy Green eyes that I got a few months ago! I absolutely loved these eyes from the start but I took a long time deciding how to use them. What finally made up my mind was finding this fantastic brown yarn in my stash. I bought it many years ago, long before I started making dolls, & had completely forgotten about it. I am so happy I rediscovered it, because it is the perfect hair for my Ivy-Green-eyed Susie!


If you'd like to get the look of this lovely curly hair, I think it's Lion Brand Homespun, possibly in Barley? Like I said, I bought it years ago & the label is long gone.

Sunnie's hair, on the other hand, is definitely Caron Simply Soft in Autumn Maize. Although it is technically worsted weight this yarn is slightly thinner & oh so soft! With Susie's hair being so magnificent Sunnie had to have something special too!

For Sunnie's eyes I used more Suncatcher eyes, this time in Shimmer Aqua! They are a little brighter than the Opaque eyes with just a touch of sparkle.


Two more girls that have those fun Shimmer eyes are sisters, Willa & Wendie!
(they also have the same matching Swim Suits!)


If you love what you see here, visit Featherby on Facebook!

Also check us out on Ravelry for these patterns & many more!

For eyes (& noses) in every imaginable color & size visit Suncatcher Craft Eyes!
The eyes pictured above are 9mm for Little Sisters & 12mm for Big Sisters!

(Also see my review of the Opaque Country Blue eyes & Sky Blue Sleepy eyes)

Thursday, April 21, 2016

A Few of My Favorite Things

When it comes to crocheting Cute & Cuddly dolls & stuffed animals there are certain tools that make things a little bit easier. Everyone has their own preferences but here are a few of my favorites.


Comfortable Hooks

  1. Clover Soft Touch - These are slightly more economical than some of the other comfort hooks available & they're amazing. I used to have problems with my fingertips getting numb & tingly when I crocheted. Since switching to these hooks I have not had that problem at all.
  2. Clover Amour - These are a little more pricey but if you watch for those lovely 40% or even 50% off coupons they aren't that bad! Unfortunately Soft Touch hooks don't come in the larger sizes so I use Amour for 6.5 mm & up. They are wonderfully comfortable & glide through the yarn effortlessly.

A Variety of Needles

  1. Metal Yarn Needle - This is great for going between stitches. I use it for sewing on limbs of dolls & my smaller stuffed animals. I prefer metal because it is less likely to snag on the stuffing & pull it out through the stitches.
  2. Super Jumbo Tapestry Needle - This needle is essential for sewing on the limbs of my Huggable Buddies. It has a blunt, bent tip & an eye big enough to thread super bulky yarn through. One of these days I'll upgrade to a metal one!
  3. Sharp Tapestry Needle - Unlike my sewing needles, the eyes of my Tapestry needles are big enough to easily thread worsted weight (4) yarn through them. I use these for embroidering noses & mouths & sewing on felt details.
  4. Finishing Needle - The ultimate weaving-in-the-ends tool! Even teeny-tiny ends!

Stitch Marker

  1. Locking Stitch Markers - I love the coil-free safety pin style. I got mine at Stunning String Studio on Etsy. These are great for marking my place, holding pieces together while I sew them & for securing the yarn if I have to put down my project for a time.
  2. Running Stitch Marker - When I'm making parts that are only a few stitches per round it seems to take more time to move my stitch marker than to finish a round. That's when I use a running stitch marker instead. I simply take a scrap of yarn & lay the yarn across where the first stitch of the round will go. Then, I make the first stitch over the scrap of yarn & continue with the round as usual. When I get back to the beginning, I flip the end of the same scrap of yarn over the first stitch of the previous round & then make the first stitch of the next round. Continuing to flip the yarn over the top of the piece marks where each round begins. Not only does this keep track of the first stitch of the current round but every single round before it. This way I can really see how straight my seam is (or isn't) & more easily count how many rounds I've completed if I lose track.

Very Sharp Scissors

These are the sharpest scissors I have ever owned. I only recently bought them so I'm hoping they will stand the test of time & a lot of use! Usually any reasonably sharp pair is good enough, but when it comes to making & trimming doll hair a seriously sharp pair saves me a lot of frustration!


Having the proper tools can save you headaches & make projects more enjoyable! And most of the time they don't even cost very much. If you're having a hard time with a certain step (say attaching the limbs) consider upgrading your tool (try switching from plastic to metal) & see if that helps!

Do you have a favorite tool that helps projects go more smoothly?

Visit me on Facebook for pictures, patterns & more!

Tuesday, February 9, 2016

Kayla's Country Blue Eyes

For most of last year I put a lot of energy into designing new outfits for my Little Sister Dolls. I love the way they turned out and I finished the year off by compiling them all into an e-Book. No sooner had I finished when my thoughts turned to the Big Sister Doll. She only had one outfit - the Winnie Dress. Obviously something had to be done about that.

So, I started resizing all of the outfits for the Little Sister Doll to fit the Big Sister Doll.  There are 10 outfits total.  She already had the Winnie Dress so my next step was to resize the other two basic or "everyday" outfits; the Millie Dress & the Gracie Shirt.

In order to do this properly I decided to make a new batch of Big Sister Dolls, all using the same yarn for consistency.  My first doll was Mia.  She turned out lovely and I made her a Millie dress in Pink.  Unfortunately her eyes are not Suncatcher Eyes, they are Darice, which is the brand I used to use.  I can only get the 12mm eyes in brown, and the 9mm eyes in brown & blue, which simply is not good enough.

Around the time I was putting the finishing touches on Mia a box of lovely Suncatcher Craft Eyes arrived in the mail.  Along with Nanuk's Sleepy Eyes, there were two pairs of doll eyes.  I decided to use the 12mm Opaque Country Blue Eyes for my next Big Sister, Kayla.

The eyes themselves are well made and a lovely pale blue.  They also come in many other realistic colors, which I am eager to try.  Like the Sleepy Eyes, they came with metal backings that are a good snug fit.  I am confident that these eyes are going to stay exactly where I put them!  Also, I find them to be generally clearer than the Darice eyes which seem almost foggy in comparison.

Along with being the first doll to have Suncatcher eyes, Kayla is also the first Big Sister to have a Gracie Shirt, which is a fun lime green!

So without further ado, I would like to introduce Kayla!


Another big thank you goes to Michelle from Suncatcher Craft Eyes for the opportunity to try out these wonderful eyes!  To read my review of the Suncatcher Sleepy Eyes click here!
Stay tuned for my review of the Opaque Ivy Green eyes!

Patterns for Big Sister Doll (includes Winnie Dress), Millie Dress & Gracie Shirt are available on Ravelry & Etsy.

Update 7/28/16 - More outfits are available for the Big Sister Doll! Now you can also make the Cozy Outfit plus Mermaid, Fairy, Princess & Super Hero Costumes! See them all on Ravelry in the Big Sister Bundle!

Many patterns are now available on Craftsy too!

To read my review of the Ivy Green Eyes click here!

Also... Kayla has a Little Sister! Meet Kinlie!


Visit me on Facebook for more info, pictures & patterns!

Get the Millie Dress & Gracie Shirt FREE with purchase of the Big Sister Pattern with coupon code: CountryBlue

Sunday, January 31, 2016

Nanuk's Sleepy Eyes

One of the most important parts of a doll or stuffed animal are the eyes. It is said that the eyes are the "windows to the soul" on a person so why not on a toy too? It is with the eyes that you can tell if the toy is happy, sad, angry or sleepy. The eyes can even make the difference between cute or creepy.

So, when I'm designing the Featherby & Friends dolls and stuffed animals I put a lot of thought into eye types, placement and colors. For my dolls I already use brown and blue eyes but since I offer custom dolls intended to match the recipient I have realized the need for more options. However, my previous source did not have the selection I was hoping for so I started searching for new sources.

That's when I stumbled upon Suncatcher Craft Eyes. First of all, I was incredibly impressed by the selection! There is every conceivable color of eyes and then some. Whether you're looking for realistic people eyes for dolls, glitter eyes for cute fairies or even glow in the dark eyes for a sneaky cat, they are sure to have exactly what you need.

When perusing the Suncatcher blog I noticed an intriguing post asking for designers who were interested in collaborating. I eagerly responded and was overjoyed when I received a lovely, positive reply asking which eyes I would like to try! Although it was difficult to decide I selected 4 pairs:
9mm Opaque Ivy Green (for Little Sister Dolls)
12mm Opaque Country Blue (for Big Sister Dolls)
20mm & 24mm Sleepy Sky Blue (for a brand new design I was playing around with!)

When they arrived I was immediately impressed by the colors and by the quality. They have very sturdy posts and metal backings, which I have found to be more reliable than plastic backings.

I started with the Sleepy Eyes. I was extremely excited about these since they are so unique. At the time I had an idea floating around in my brain (plus a few doodles and notes) and the Sleepy Eyes seemed like exactly the thing to bring the project to life. My idea was for a cute, cuddly, and very huggable Polar Bear. I wanted him to look like the perfect buddy to snuggle with. I requested 2 sizes since I wasn't sure exactly how big they would need to be to get the right look.

After a little experimenting I ended up using the 24mm eyes. They are absolutely perfect and give him the sweet, sleepy expression I was hoping for! The finished Polar Bear is about 14 inches long, 10 inches tall and 6 inches wide. He is made with Bernat Baby Blanket yarn and is extremely soft and squishy!

So without further ado, I would like to introduce Nanuk!


Nanuk is now available on Etsy!

Pattern will be coming soon to Etsy & Ravelry!

Visit me on Facebook for more info, pictures and patterns!

I would like to say a big thank you to Michelle from Suncatcher Craft Eyes for the opportunity to try out these wonderful eyes! 

Stay tuned for my review of the other two pairs - Ivy Green & Country Blue Opaque


Sunday, October 5, 2014

One Pattern: Two Hats


Every year with the arrival of cool weather comes a sudden urge to get out my yarn and make something warm! This year I started with some super-cute kids' hats. I found a fantastic basic ear-flap pattern and decided to spice it up. The pattern is done almost entirely in half-double crochet so it works up quickly but is still a tight enough stitch to be warm. However, my favorite thing about this pattern is that it comes in every size! Change up the size, colors and embellishments and this hat has endless possibilities.

I made two hats, both for boys. The first hat is a shark hat for a 1 year old (I used the 12-24 month size) and the second is a camo dinosaur/monster hat for a 4 year old (I used the 3-5 year old size). I used this pattern for help with the shark fin and teeth but improvised for the other details (dinosaur/monster spine, shark chin strap and eyes).


Next up: Purple hat for a 5 year old girl! With pompoms perhaps?

Credit goes to Rhondda of Oombawka Design and Sarah of Repeat Crafter Me for the fabulous patterns!


Update 10/12/14: The third hat!